After seeing the orange garland DIY trend year after year on Pinterest, I finally gave it a try and I’m here to tell you to go for it if you’re considering making one yourself! This Christmas craft is so easy, smells delicious, and can be used for several years if stored properly. In this post you will learn everything you need to know before tackling this dried orange garland DIY project!
This post may contain affiliate links, which means I’ll receive a commission if you purchase through my links, at no extra cost to you. Please read the full disclosure for more information.
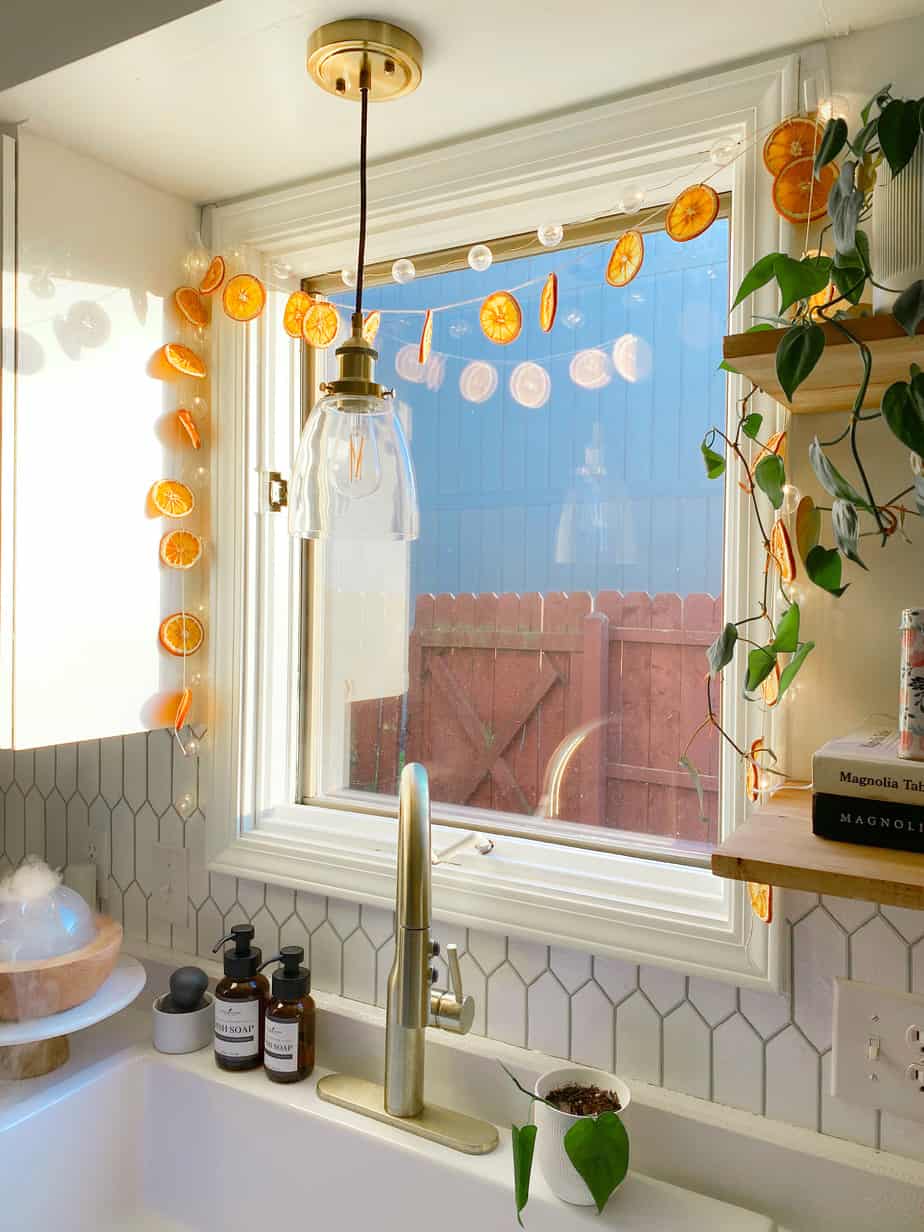
I think the best place to a dried orange garland is along the trim of a window. When the sun shines through the orange slices it looks like beautiful stained glass. Hang string lights with your garland and you will get a similar effect after sunset.
While the prep work for this orange garland DIY is fairly quick, the orange slices will have to dehydrate in the oven for several hours. While you wait for the oranges to finish drying in the oven, create a stovetop potpourri with any extra orange slices! Add them to a pot of water with cranberries, a couple of cinnamon sticks, and a sprig of rosemary. Bring the mixture to a boil then reduce to a simmer. Your entire house will smell just like Christmas all day long!
Orange Garland DIY supplies:
Jumbo navel oranges
You will need 2-3 oranges to create a garland similar to the size of the one pictured above. I chose jumbo navel oranges to get biggest orange slices possible. Choose oranges with a thick peel to ensure you’ll have a thick white rind between the dark orange peel and the lighter orange slices. Once dried, the orange slices have a gorgeous variation of colors.
Sharp knife
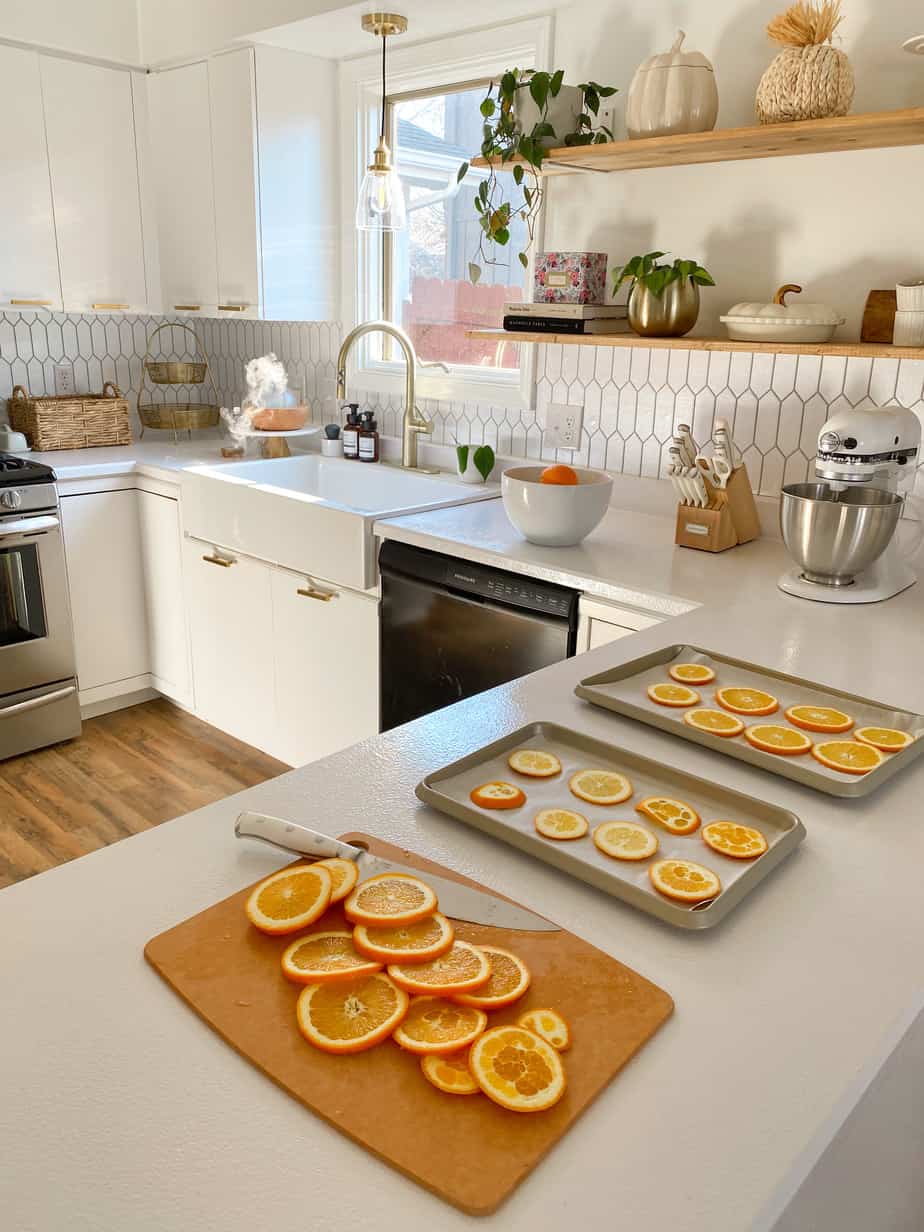
The thinner you slice the oranges, the quicker they will dry in the oven. You want to be careful not to slice your oranges too thin though, because they might start to burn and curl as they bake. Try to cut the slices about 1/8 – 1/4 inch thick. This knife set is so beautiful, yet very affordable!

Cutting board
New cutting boards are such a good gift idea! I feel like it’s one of those things that you don’t really want to buy for yourself, but would love to have! I got mine as a white elephant gift last year and I love them!
Paper towels
You will need these to soak up as much juice from the oranges as possible before baking.
Baking dish
This is optional. I stored mine in a baking dish lined with paper towel until I transferred them to a cookie sheet.
Baking sheets
Another great gift idea!
Parchment Paper
You will use this to line the baking sheets to prevent the oranges from burning.
Yarn needle
Make sure you buy one with a large opening for thicker string!
String
I used bakers twine with a string of glitter! I have also seen people use fishing line or add wooden beads between each orange.
Command Hooks
These are a lifesaver during the holidays! I have them everywhere hanging garlands, lights, stockings, etc.
Orange Garland DIY Instructions:
- Preheat oven to 225
- Cut oranges into thin slices 1/4 -1/8 inch thick
- Place oranges in baking dish lined with paper towels
- Line baking sheets with parchment paper
- Transfer orange slices to baking sheets and use paper towel to blot oranges and soak up any extra juice
- Bake for 1.5 hours
- Flip oranges and bake for an additional 30-40 minutes
- Remove from oven and place on baking sheet
- Let sit for a few days to completely dry
- Thread string through each orange, tying a knot around each one to keep it in place
- Use command hooks to hang garland
Oven temperatures and cooking times may vary. I had to remove the orange slices around 40 minutes after flipping them because they were starting to burn even though they were still soft. I think letting them sit for a few days on a cooling rack helped allow the oranges to completely dry. This step isn’t completely necessary but I think it helps when threading the string through each orange if they are as dry as possible. When you take your garland down after the holiday’s, store it in a cool dry place to use again next year! You could also use any extra dried oranges to decorate your Christmas gifts! Not only does it add a pretty decoration, it will also smell amazing while someone is opening your gift!
I hope this post gave you helpful tips on how to complete your own orange garland DIY project. Thank you for reading and supporting my blog!
Xo, Ciara
Looking for gift ideas for the homebody in your life? Check out this post next!
