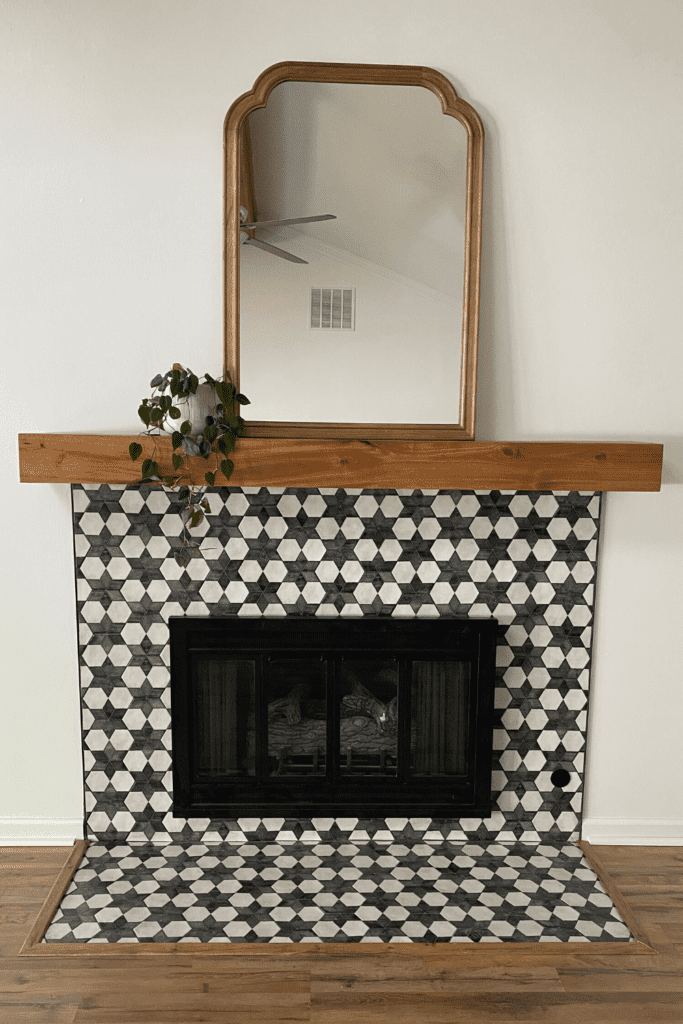
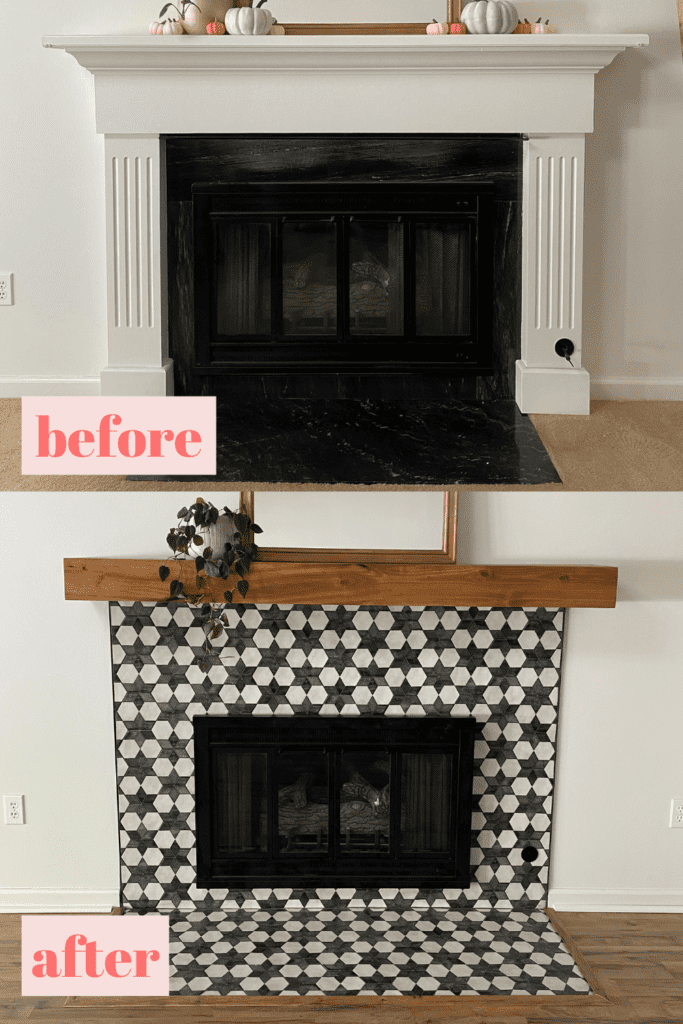
If you have considered starting a DIY tile fireplace makeover, then you have landed on the perfect blog post! In this post you will learn all of the steps to consider from design to demo to install!

This post may contain affiliate links, which means I’ll receive a commission if you purchase through my links, at no extra cost to you. Please read the full disclosure for more information.
When I first began planning a DIY tile fireplace makeover, I just planned on putting peel and stick tile over our existing marble. I still think that is a fabulous way to update your fireplace on a budget! Since we are currently working on putting in new flooring, we decided it would be a good time to completely redo the tile so we could expand the hearth. Once we removed the fireplace surround, we realized it was pretty outdated and we completely changed our plans. Why does it seem like every time we try to do a simple home renovation we end up knocking down walls and multiplying our budget?!

Here are the steps we took during our DIY tile fireplace makeover and all of the tips we wish we knew beforehand.
Step 1: Remove fireplace surround from wall
We weren’t sure how this was going to go, and it was surprisingly the easiest part of this project! First we went around the edge of the moulding with a knife to slightly separate it from the wall. Then, using crowbars, we pulled it away from the wall in one piece. Btw, by “we” I mean my husband did all of this. Glad we cleared that up! If you aren’t planning on attaching it back to your wall, list it for sale on Facebook marketplace!! We sold ours for $75 and had tons of inquiries! A lot of people who don’t have a fireplace in their home will put a mantel on the wall to create a faux fireplace to decorate! The couple who bought ours was doing that exact thing and they were so excited!
Step 2: Remove any existing tile
My husband removed the existing marble by prying it off with a crowbar. Luckily, this was an easy process for because it all came off in a few large pieces. Depending on what material you are removing this might be a more tedious project. If there’s one thing I learned from this entire project it’s how messy it is!! The mess during any home renovation project makes it so much more stressful, in my opinion! Make sure you have a shop vac nearby to help keep things somewhat clean, and for the sake of your sanity. I tried to link the shop vac we have for you but my husband said it is over 10 years old. I found an updated version of the same brand here and I imagine it is just as good, if not better.
Step 3: Remove damaged drywall and replace with new drywall
It is important to put up new drywall so you have a flat, solid surface to work with. Since we were tiling over the new drywall, this didn’t have to be perfect. To remove the damaged dry wall my husband used this power multitool. You will have to screw the new drywall sheets into studs, so make sure when you cut out the old drywall you expose at least half of a stud to screw your new drywall board into.
Step 4: Attach trim pieces
After we tiled our guest bathroom shower I really wished that we would have used these metal trim pieces! I insisted that we put them up during this DIY tile fireplace makeover and I think it looks so clean! We also used this laser level which helps make sure that your tiles are straight.
Step 5: Place tiles in desired pattern
We are not at all professional tilers so I can’t give too much advice here, other than sharing the mistakes we made. We both have no idea how this happened but once we got towards the top of the fireplace, we noticed our spacing was wayyy off. Luckily, the mortar wasn’t completely dried so we were able to rearrange things a bit. We ended up spacing the tiles further apart towards the top and cuts on the end tiles larger on the left side than the right. You seriously cannot tell just by glancing at the fireplace and you would really have to look up close and examine it to notice the imperfections. I highly recommend watching a professional tiling tutorial before attempting a project like this!
Step 6: Apply grout
Originally we planned on using a light grey grout since that’s what was used in the sample at Lowe’s. We ended up going with black because we thought it would hide the imperfections a bit better (and it did!). I recommend shopping around for the grout to find the best price. We got ours from Lowe’s and they had very limited options. The premixed grout only came in an extra large container and was very expensive. We only needed a small amount so we went with the unmixed bag, which requires that you mix in water until it is a thick consistency.
Step 7: Hang mantel
I planned on building our own mantel but this project took way more time than we expected and I ended up purchasing this one from Lowe’s. We are really happy with the quality and appearance, but we definitely could have built the exact same thing for way less money. Again, it was worth the price for convenience and the time we saved. If you want to build this, all you need to do is nail together 5 boards in the shape of a box without a back board. Screw a long scrap piece of wood into the wall, slide the box over that piece, and attach the box to the scrap piece of wood with screws. You can see how we installed our mantel in the video below.
I hope this post was helpful if you are planning a DIY tile fireplace makeover! I shared the demo process on my Instagram stories, so make sure to check that out and let me know if you have any questions about this project!
Thanks for reading!
Xo, Ciara
