I will be the first to say that clear, glowing skin starts on the INSIDE. The products you use on top of your skin can only do so much if what’s on the inside is irritated, inflamed, or lacking support. I notice when I’m drinking enough water, eating nutritious foods, getting good sleep, taking my supplements, and avoiding toxic ingredients my skin is much clearer than when I fail to prioritize my health. Ok, now that we’ve addressed that, let’s talk about my number one beauty secret for dewy, glowy skin. (If you follow me on Instagram, you know this isn’t a secret at all… I can’t stop talking about it!) I’m so excited to share with you my DIY face serum for glowing skin.

This post may contain affiliate links, which means I’ll receive a commission if you purchase through my links, at no extra cost to you. Please read full disclosure for more information.
If you follow any essential oil users on social media, you may have seen people talk about this glow serum before. I have been making and using this DIY face serum for a few years now, so I will tell you everything you need to know before making it for yourself.
Carrier Oils
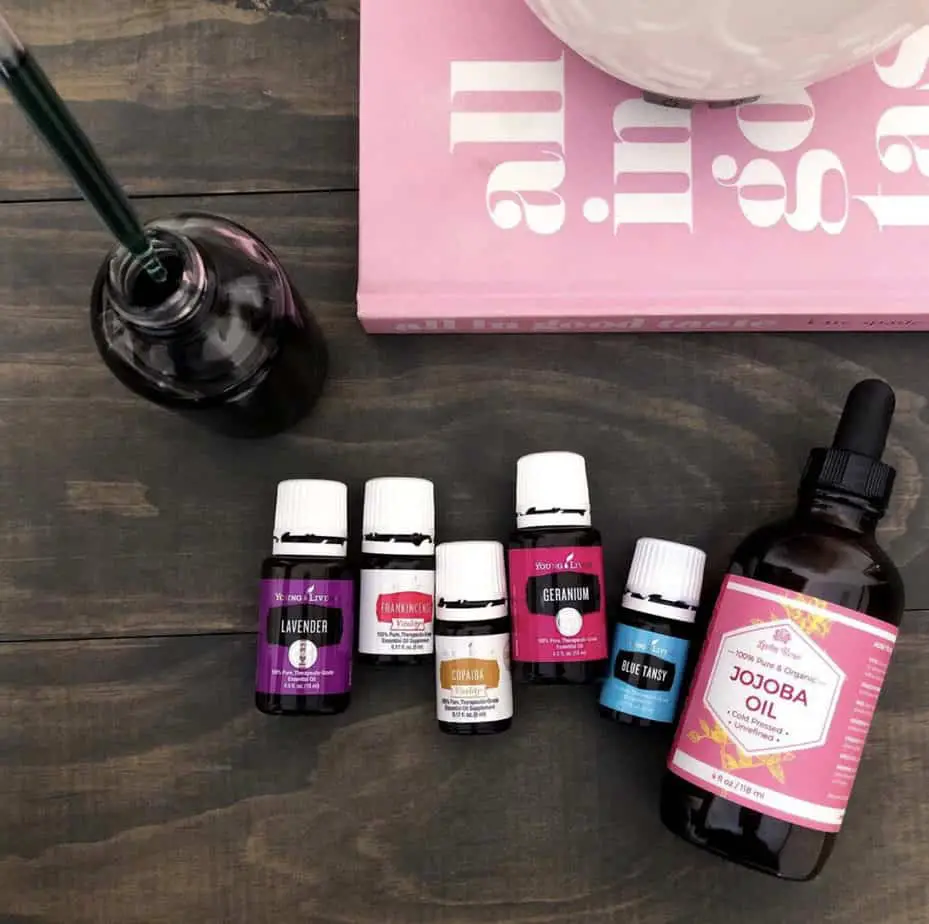
A carrier oil is a vegetable oil that dilutes the concentration of essential oils. Because essential oils are very potent, certain oils can be irritating to the skin if applied directly without a carrier oil. Examples of carrier oils include coconut oil, grapeseed oil, olive oil, etc. I choose jojoba oil as the carrier oil in my DIY face serum because it is moisturizing and does not clog your pores. When purchasing jojoba oil, you want to make sure it is 100% organic and from a good source. I usually get this one from Amazon or this one from Thrive Market.
Essential Oils
I cannot emphasize this enough – not all essential oils are made the same! You do not want to put essential oils on your skin if you are not sure where they are sourced from. Oils made from fragrance in a lab? Hard no. In addition, if you want to see real results from essential oils, it’s very important that they are sourced properly. For these reasons, I buy my essential oils from Young Living. They have farms all over the world where they use organic methods to grow the plants they distill the oils from. This entire process is completely transparent and they even allow visitors to their farms!
As far as which oils to put in your DIY face serum, that is up to you depending on your skin type! I originally started with a combination of lavender, frankincense, and copaiba. I feel like this is a good recipe for every skin type. Lavender is soothing, frankincense is healing, and copaiba helps reduce inflammation. Over the years, I have switched up my glow serum recipe depending on the needs of my skin. Recently, I have added tea tree and geranium to help with acne. I absolutely love the smell of geranium! Some of my other favorite skin supporting oils include rose, blue tansy, bergamot, and patchouli.
How to Buy Essential Oils:
- Click this link that will take you to my favorite Young Living skincare products
- Select the products you would like to purchase
- If your order reaches 100 pv you will unlock 24% off of each product
- Click add to cart & checkout
- Check for a welcome e-mail from me so we can stay in touch if you ever have questions about your oils!
Directions:
- Put 20-30 drops of each oil in your glass bottle
- Fill with jojoba oil
Personally, I do not follow an exact formula or recipe. That might be frustrating if you’re making this for the first time, but I truly think it takes trial and error to figure out how you like it. I tend to use anywhere from 3-6 different oils and I vary the number of drops anywhere from 20-30 per oil. I use a 4 oz bottle because it lasts for SO long. Just put your oils in first then fill with jojoba oil.
How to use:
This DIY face serum is so versatile, I use it 4 different ways! It can replace both your moisturizer and your makeup remover. I also use it to dilute my tanning drops.
- Apply glow serum in the morning as a moisturizer. Just use a few drops, trust me you do not need much! It will give your face a natural highlight, and creates such a pretty glow underneath your makeup!
- Mix these tanning drops with your DIY face serum. I apply this in the morning and it gradually tans my face throughout the day. You can also do this at night so you wake up with a bronzed glow. I use these drops about twice a week.
- Use your DIY face serum to remove your makeup. Rub it all over your face and your makeup will come right off! Use a cotton ball to wipe off any stubborn mascara. This will serve as your first step to cleansing. Once your makeup is off, use a soap cleanser to deep clean your pores.
- Use this serum at nighttime before applying moisturizer. Apply the DIY face serum first, then apply my moisturizer. I feel like this layering method really pushes the glow serum into my skin and I wake up with extra plump and hydrated skin.
I hope this post was helpful and gave you everything you needed to know about making a DIY face serum for glowing skin. Feel free to comment, e-mail or DM me on Instagram if you have questions!
Xo, Ciara
